
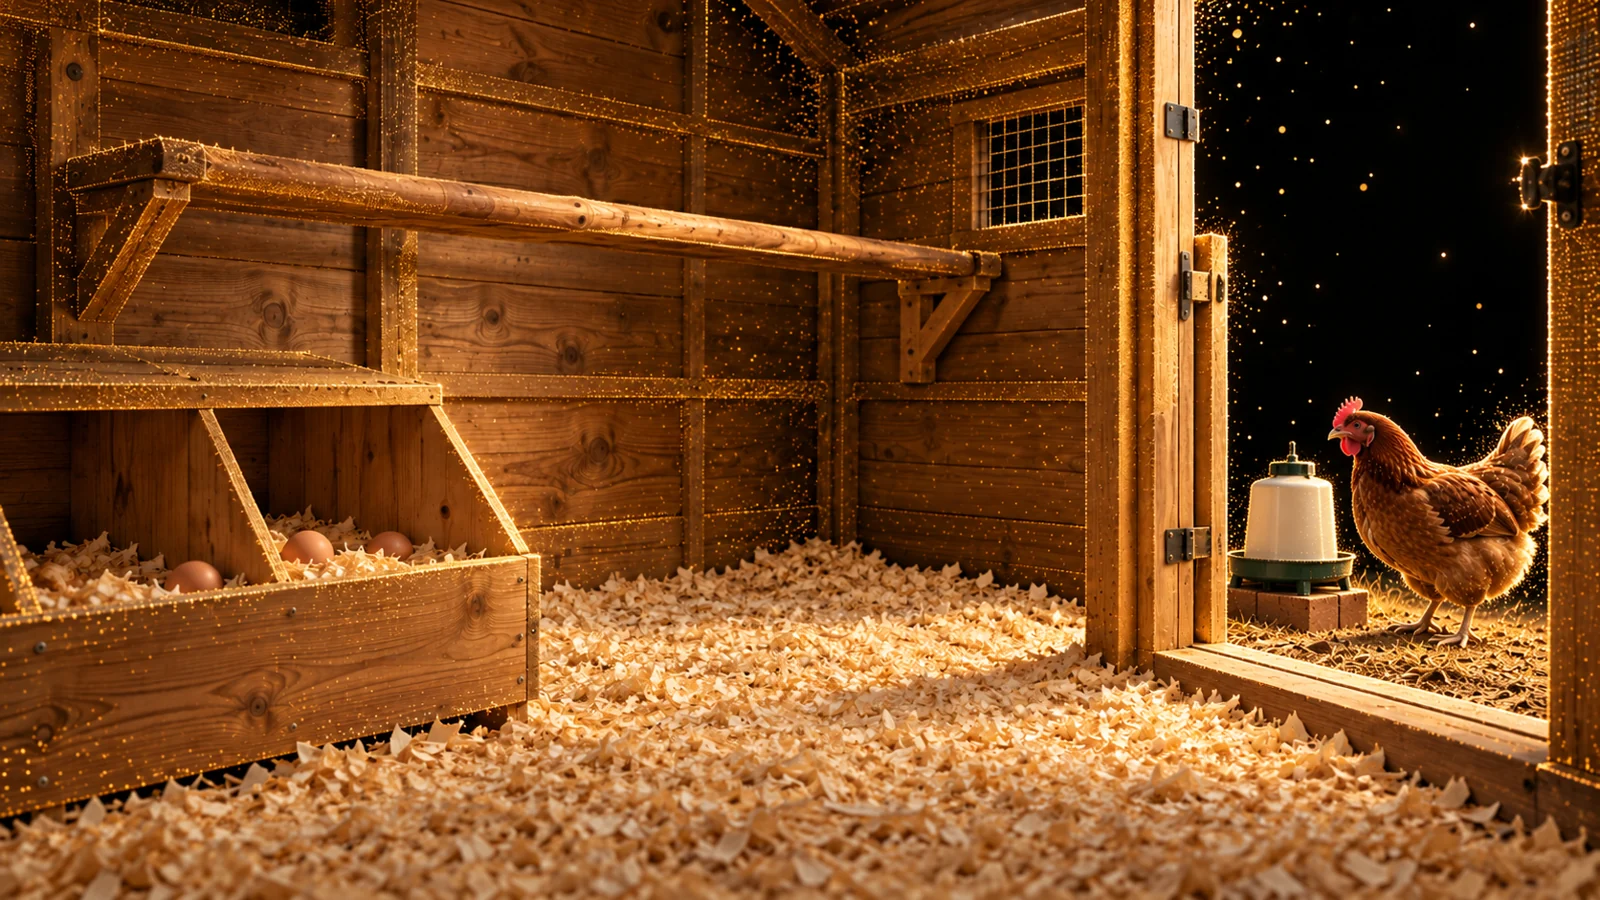

A chicken coop does not need to look like a showroom. It does need manageable bedding, clean drinking water and air that does not sting your eyes. Learning how to clean a chicken coop is mostly about noticing trouble early and doing the steps in the right order.
The routine below is designed for an ordinary backyard flock. It separates everyday maintenance from a full clean and from disease-response work. A calendar is useful, but wet litter, dirty water or sick birds should never wait for the next scheduled cleaning day.
GUIDED ARTICLE EXPERIENCE
How to Clean a Chicken Coop: Safe Steps & Maintenance Schedule
Read along as the narration moves through the article.
Private device narration · No hosted audio or tracking
CONTINUE GUIDED TOUR
Continue where you left off.
GUIDED TOUR COMPLETE
You have reached the end of this study.
Study record saved on this device.
GUIDED TOUR
How to Clean a Chicken Coop: Safe Steps & Maintenance Schedule
Narrator: Paranoid Prophet Recommended Voice Native device narration
Prepare to follow the article as it is narrated.
VOICE & TOUR OPTIONS
Voice & Listening
NARRATOR
Finding a narrator…
Checking the best narrator available on this device.
Restores the best curated narrator available on this device.
Narrator choices are curated for clear, long-form listening on this device.
Screen-awake support will be checked when narration starts.
CHOOSE A NARRATOR
Curated for this device
Choose a verified narrator for this browser, or use System Narrator. Automatic mode uses the best reliable route exposed by this device; your chosen narrator is preserved even if this device needs a temporary fallback.
Preparing the guided article experience…
RESUME GUIDED TOUR?
Continue where you left off.
GUIDED TOUR COMPLETE
You have reached the end of this study.
Article Guide17 sections
Quick Answer: Remove Dirt Before Disinfecting
Inspect daily, remove wet or heavily soiled material, keep feeders and waterers clean and fix the source of recurring moisture. For a deeper clean, move birds safely, remove debris without raising dust, wash and rinse suitable surfaces, then use an appropriate disinfectant according to its label. Let the enclosure dry and satisfy all label re-entry requirements before birds return.
Never mix cleaning chemicals or clean poultry equipment in the kitchen. If a flock has unusual illness or deaths, call a veterinarian or animal-health authority before moving potentially infected birds, litter or equipment. An outbreak is not simply a bigger version of the weekly tidy-up.
A Daily, Weekly and Condition-Based Routine
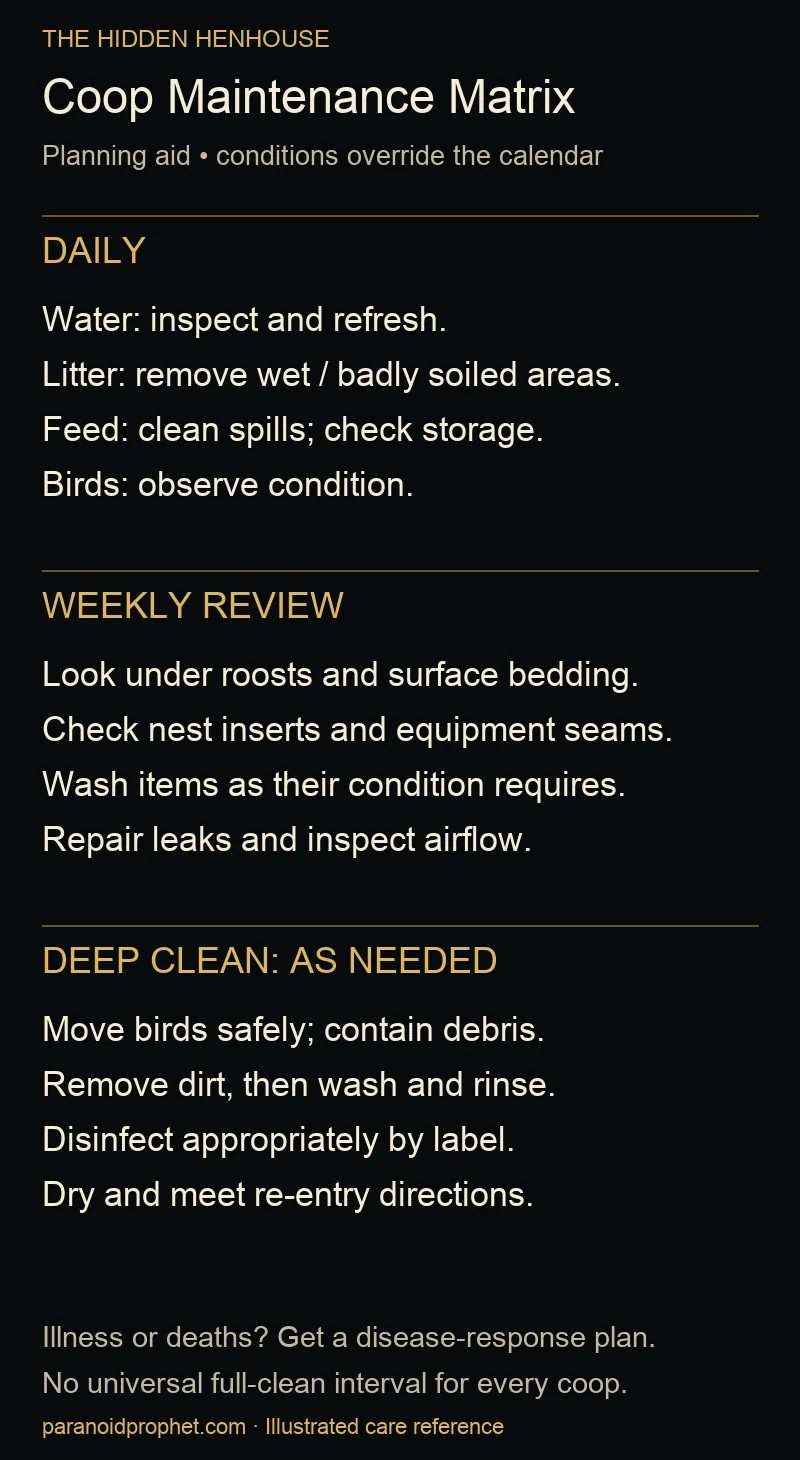
This schedule is our practical editorial framework, not a scientifically fixed interval for every coop. Flock size, rain, bedding, ventilation and waterer design change the workload. Use the condition of the coop to adjust it.
Daily: water, wet spots and obvious problems
- Check actual water cleanliness and access. Replace contaminated water and clean the container when needed.
- Remove spilled feed and check that stored feed is protected from moisture and pests.
- Remove wet or badly soiled bedding, especially around waterers and under heavily used roosts.
- Check nest material, bird condition and any new odor or moisture problem.
Weekly: inspect the places a quick glance misses
Look under roosts, behind removable nest inserts and around leaking drinkers. Examine feeder rims, waterer seams and accessible parts for buildup. Check the floor beneath apparently clean surface bedding. A fresh top layer can hide a wet layer below.
Use the inspection to decide what needs washing, bedding replacement or a repair. A small coop with a leaking waterer may need attention much sooner than a larger, well-drained shelter.
Deep clean: when conditions or the flock plan require it
Plan a full clean when bedding cannot be kept acceptably dry and manageable, after substantial buildup, or at the interval appropriate to the chosen housing system. A veterinarian may require a different process after disease or parasites. Do not promise that one annual clean is enough for every yard.
Before You Start: Birds, Equipment and a Waste Plan
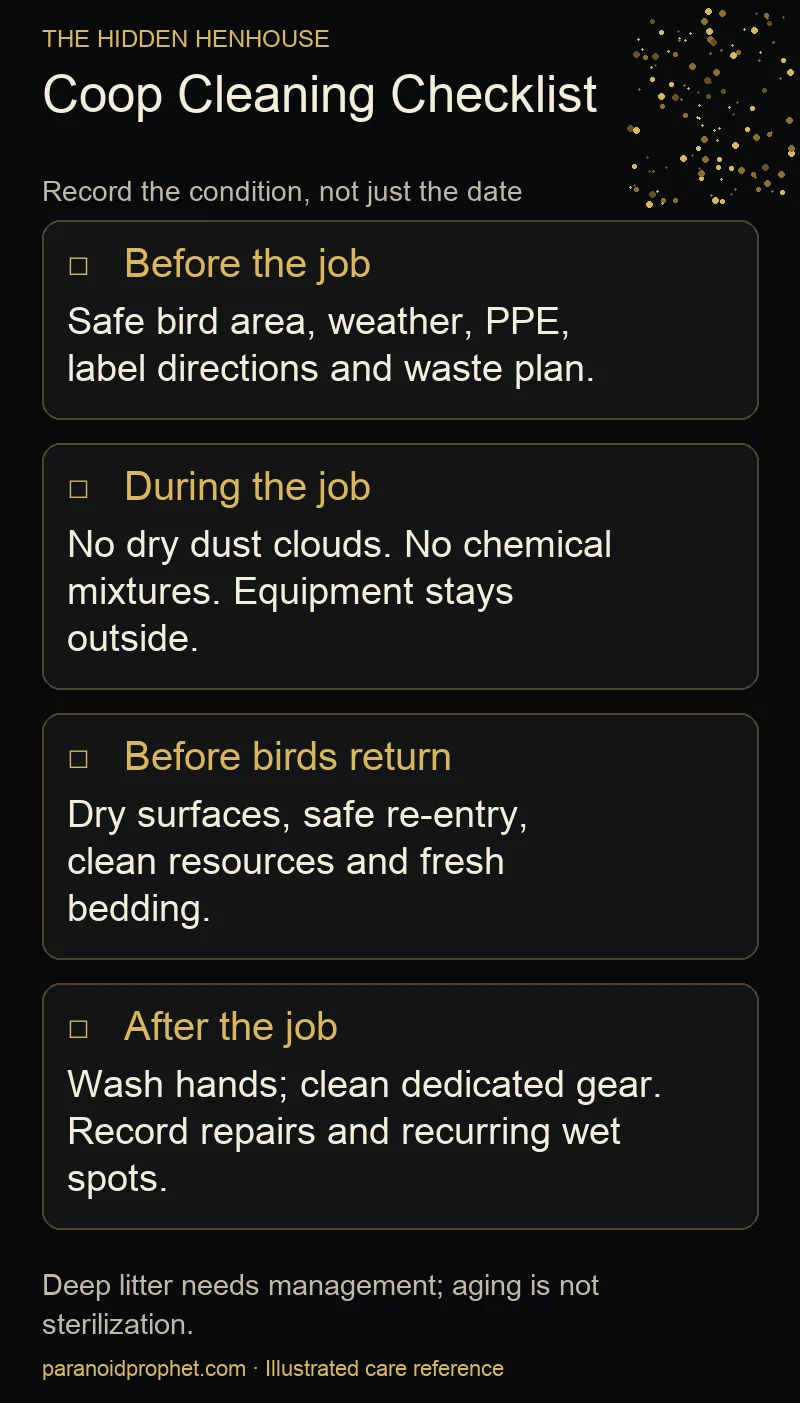
Choose a day when surfaces can dry and arrange a secure temporary area with water, suitable shelter and predator protection. Birds should not stand in chemical spray or the dust raised by removal. If infectious disease is suspected, get instructions before moving them to another location.
Gather dedicated boots, gloves, tools, suitable eye and respiratory protection, cleaning supplies and a secure container for removed material. Read product directions before opening the bottle. Decide where waste and wash water will go without contaminating the garden, play area or drinking-water sources.
Keep children and other animals away from the cleaning area. The predator-proofing guide can help assess the temporary enclosure; an open yard is not secure merely because someone is cleaning nearby.
Step 1: Remove Bedding and Organic Debris Without Raising Dust
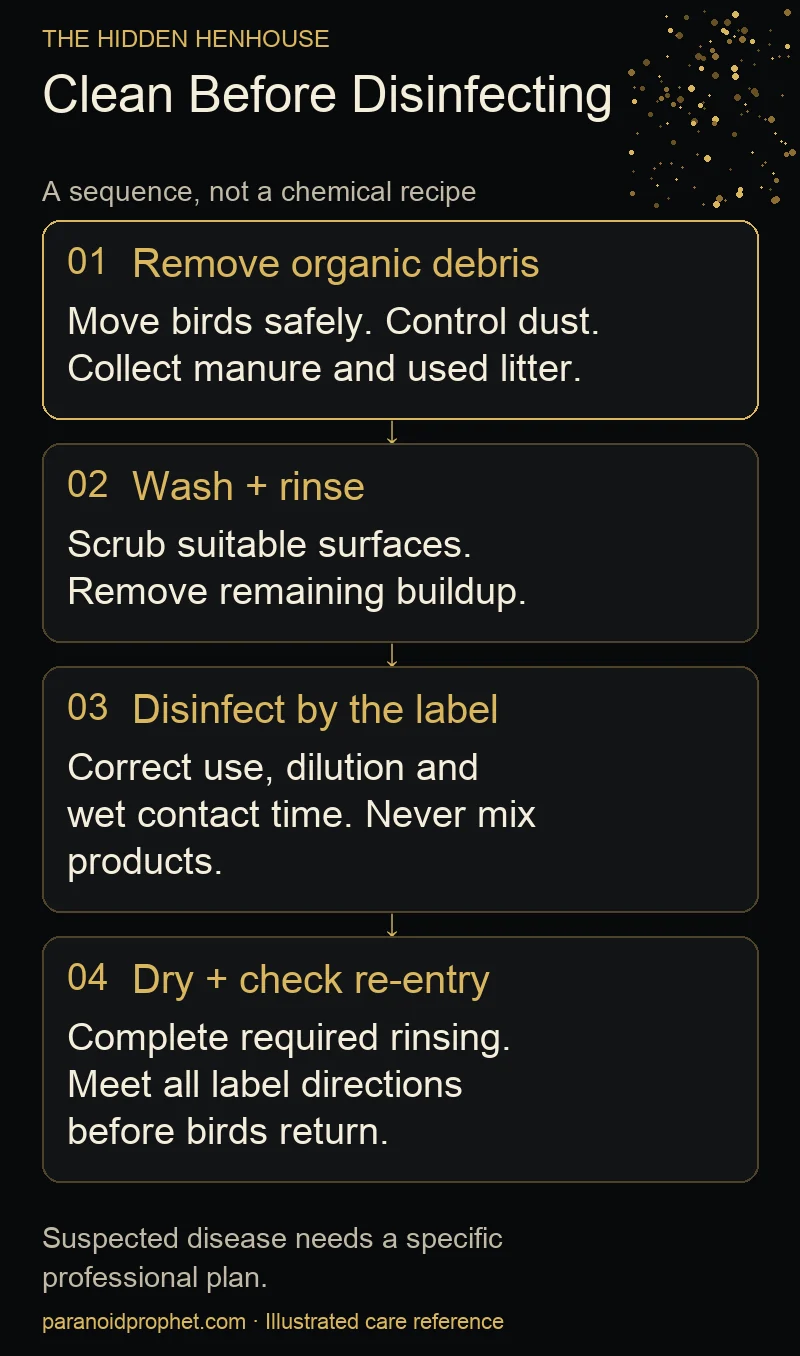
Remove manure, feathers, feed residues and used bedding before disinfecting. Work carefully rather than sweeping dry dust into the air. Where necessary, carefully dampen dusty material enough to limit airborne dust, without flooding the coop or creating contaminated runoff.
CDC/NIOSH dust-control guidance advises against dry sweeping or shoveling dusty accumulations of bird droppings. Large, old accumulations, especially in enclosed spaces, need a risk assessment and may require professional help.
USDA’s cleaning checklist calls the debris-removal stage “dry” cleaning, followed by washing. That phase description is not a reason to generate a cloud of dust. We preserve the USDA sequence while applying the more specific human-exposure guidance to how material is removed.
Step 2: Wash, Scrub and Rinse Suitable Surfaces
After debris removal, wash accessible surfaces with water and detergent appropriate to the material. Loosen remaining buildup, then rinse. Work so dirt is not repeatedly washed onto an already cleaned area.
Inspect wood, seams and removable fittings. Damaged or deeply contaminated porous material may be difficult to clean thoroughly. Repair or replacement decisions should reflect the material and any disease-control advice, rather than relying on a stronger chemical solution.
The USDA enclosure-cleaning checklist explains the central problem: organic matter and caked-on dirt interfere with disinfection. Spraying dirty bedding does not replace cleaning.
Step 3: Disinfect When Appropriate, Using the Exact Label
Choose a product labeled for the intended poultry premises or equipment, surface and target organism. Follow its dilution, application, contact-time, ventilation, protective-equipment and re-entry requirements. If rinsing is required, include that step.
EPA explains contact time as the period a surface must remain wet with the product for the claimed disinfection. It is not a universal number. Wiping a surface dry immediately can defeat the labeled process.
Do not combine bleach with ammonia, acids or other cleaners, or improvise chemical mixtures. Use each product as directed. EPA’s safe-use guidance emphasizes labels and the danger of mixing products. This article supplies no homemade bleach concentration.
Routine spot cleaning is not a requirement to spray disinfectant over occupied bedding every day. Full disinfection should have a purpose and a suitable method. For suspected disease, follow the specific veterinary or animal-health plan rather than a general household-cleaning routine.
Step 4: Dry, Rebuild and Check Before Birds Return
Let cleaned surfaces dry, complete any required rinsing and meet the product’s re-entry directions. Restore suitable bedding and clean, functional feeding and drinking equipment. Check doors, fasteners and ventilation before returning birds.
Drying time depends on weather and materials; this guide cannot give a reliable universal waiting period. “It no longer smells strong” is not a substitute for the label.
Feeders and Waterers: Small Parts Matter
The waterer guide covers flow, leaks and daily checks. For the nesting area, use the nest-and-roost guide; after collection, follow the separate egg-handling and storage routine.
Clean these items outside the home. Remove feed or water residues, disassemble removable parts as the manufacturer allows, scrub, rinse and use an appropriate disinfection process when needed. Meet label rinsing and re-use requirements before refilling.
Pay attention to seams, rims, valves and nipple mechanisms. After reassembly, confirm water flows and the container does not leak. Use a clean spare while equipment is being cleaned so birds keep access to feed and water.
CDC’s backyard-poultry guidance specifically says to clean poultry equipment outdoors. Moving a dirty waterer to the kitchen sink transfers the problem into a food-preparation area.
Bedding Replacement and Deep Litter Are Different Plans
With routine bedding replacement, remove soiled material and replace it before moisture and manure become unmanageable. With a suitable deep-bedding or deep-litter system, the keeper still monitors conditions, manages the material and performs planned cleanouts. Neither approach means leaving wet litter alone.
Minnesota Extension’s winter guide, reviewed in 2026, describes both routine soiled-bedding removal and a managed deeper bedding option that still requires a spring cleanout. That is winter-management guidance, not proof that every small coop safely composts its litter.
Do not assume warm bedding is sanitized compost. Check the coop bedding guide for material tradeoffs and winterizing the coop and run for seasonal moisture management.
Ventilation, Dust and Protection for the Cleaner
Cleaning and airflow work together. Recurring wet litter needs investigation of leaks, drainage and ventilation. Minnesota Extension recommends manure removal and improved ventilation when ammonia odor or condensation appears. Do not wait for an irritating smell as the only inspection method.
Gloves and dedicated footwear help keep contamination contained. Respiratory protection needs to match the task and exposure, and product labels may specify additional protection. A loose paper mask is not a universal answer for a neglected, dusty enclosure.
NIOSH distinguishes ordinary poultry work from higher-risk cleanup of large droppings accumulations. Properly selected and used NIOSH-approved respirators are part of protection; high-risk work can require more than a filtering facepiece. Get qualified advice rather than assuming any mask makes heavy cleanup safe.
Manure Handling: Keep It Out of Runoff and Food Areas
Keep removed manure and bedding in a protected place where children and pets cannot access it and rain cannot carry contamination into edible crops or play areas. Follow local disposal rules. Do not move suspected infectious material offsite without instructions.
Composting can be useful, but aging and verified composting are different processes. The University of Nevada manure guide distinguishes active pathogen reduction through properly managed composting from the gradual reduction associated with aging.
A heap sitting for a few months is not automatically pathogen-free. Before using poultry material around food crops, get current Extension advice about the actual composting process and application-to-harvest restrictions. This cleaning guide does not certify a home pile or supply a universal “safe after six months” rule.
Children, Handwashing and Backyard Hygiene
Healthy-looking chickens can carry germs. Keep coop footwear outside, wash hands with soap and running water after poultry contact, and keep food and drinks out of the poultry area. Supervise children’s handwashing.
CDC says children younger than five should not handle poultry. Young children, older adults and people with weakened immune systems are more vulnerable to illness from poultry-associated germs. Adults should handle dirty litter and chemicals; children should not be assigned disinfectant application.
Keep Feed Spills and Wildlife Access Under Control
Clean spills promptly, protect stored feed and inspect openings that allow rodents or wild birds access. Cleaning is only one part of prevention. A tidy coop with a constantly spilled feeder can still invite pests.
Check bird plumage and coop crevices when scratching or skin irritation appears. Our mites and lice guide explains why some parasites need attention on birds and others in sheltered housing joints. Disinfectant is not automatically an effective parasite treatment.
Common Mistakes and a Simple Record
- Covering wet litter with fresh bedding without fixing the leak.
- Spraying disinfectant onto manure and treating the smell as proof of sanitation.
- Dry sweeping, using a leaf blower or creating unnecessary airborne dust.
- Mixing cleaners or guessing a dilution and contact time.
- Bringing poultry equipment into the kitchen.
- Returning birds before drying and label re-entry requirements are satisfied.
- Following a routine checklist when a disease-response plan is needed.
Record the date, wet areas, equipment cleaned, bedding removed and repairs made. When using disinfectant, record the product and the relevant label instructions. The purpose is to notice repeat problems, not produce perfect paperwork.
Frequently Asked Questions
How often should I fully clean the coop?
Use conditions and the housing system to decide. Inspect daily and regularly review hidden buildup. Wet bedding, dirty equipment or a health issue can require action before the planned cleanout.
Can I use vinegar instead of a labeled disinfectant?
Do not assume a household ingredient provides a required disease-control claim. Choose the product and process for the actual intended use. Never mix vinegar or other acids with bleach.
Does deep litter eliminate cleaning?
No. It changes how bedding is managed. Moisture, airflow, material condition and eventual cleanout still need attention.
What if several chickens become sick?
Contact a veterinarian or animal-health authority promptly. The sick-chicken guide helps organize warning signs. Do not distribute birds, litter or equipment while guessing at the cause.
Stewardship in the Ordinary Work
The least glamorous flock chores often matter most. Clean water, manageable bedding and thoughtful waste handling serve the birds, the household and the neighbors. Good care is a routine that catches small problems, with enough humility to ask for help when the situation changes.
Sources and Responsible Care
Reviewed October 8, 2026. The suggested maintenance cadence is an editorial planning aid. Labels, local requirements and veterinary disease-response instructions take priority over this general routine.
- CDC: Backyard Poultry, July 18, 2025. Outdoor equipment cleaning, handwashing and higher-risk groups.
- USDA APHIS: Defend the Flock checklists. Enclosure cleaning checklist issued November 2018; debris removal, washing, disinfection and drying.
- USDA APHIS: Biosecurity Basics. Disease prevention and escalation.
- CDC/NIOSH: Dust and exposure controls, January 11, 2024. Avoiding dry, dusty removal.
- CDC/NIOSH: Personal Protective Equipment, January 18, 2024. Task-specific respiratory protection.
- EPA: Registered Disinfectants. Product labels and wet contact time.
- EPA: Safe Disinfectant Use, April 23, 2020. Following directions and avoiding improvised mixtures.
- Minnesota Extension: Cold-Weather Chicken Care, reviewed 2026. Ventilation, manure and managed bedding.
- Nevada Extension: Using Chicken Manure Safely, 2013. Storage, aging and composting distinctions; seek current local food-crop guidance.